 The following options assume you have already imported and/or manually entered your data.

If you plan to submit your uploads separately, make sure to upload in order, Printing & Mailing first, Electronically file second.
____________________________________________________________
How can we help?
Click on the plus sign (on the left side) to expand any of the options below.
Uploading your Print & Mail only file via the Service Bureau
|
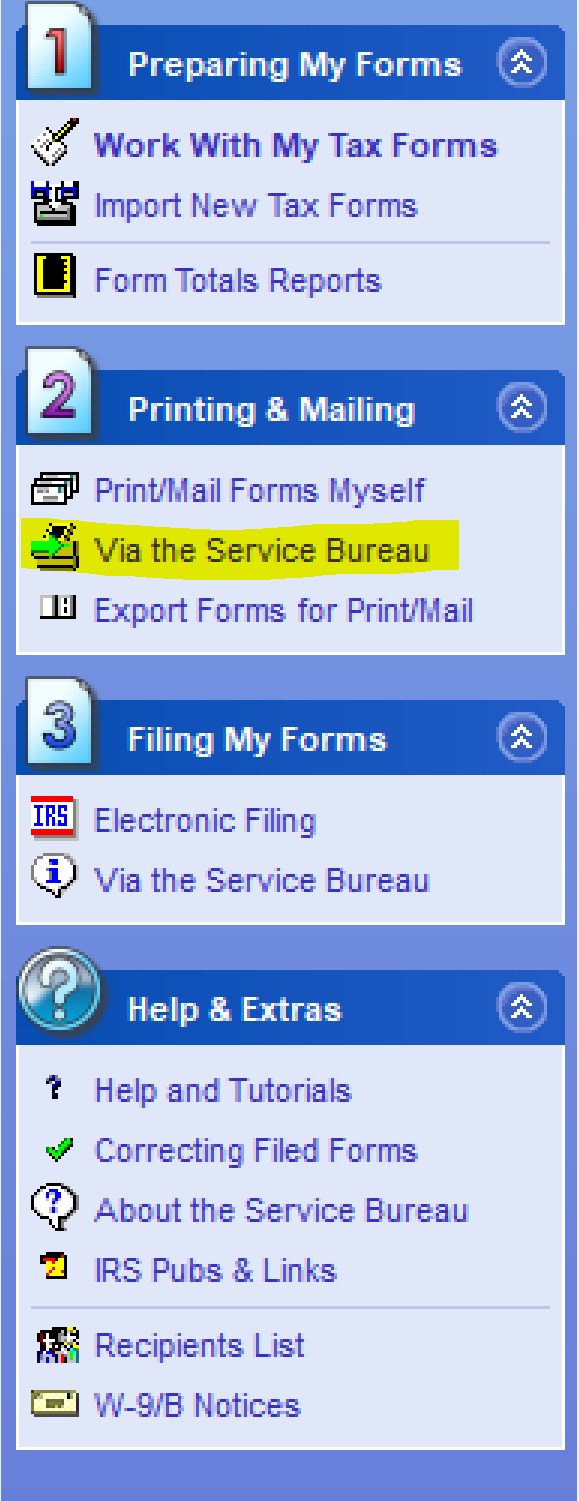
Filing Electronically via the Service BureauBefore you begin, it is important to update your software to the most current version and you have imported/manually entered your data into the software.On the third step labeled 'Filing My Forms”, you should click on the option 'Via the Service Bureau' to proceed with your upload. Then click on “Filing with the IRS Upload” to initiate a helpful wizard that will guide you through 1. Check for Updates: It is essential to ensure that you are using the most up-to-date version of the 1. Select Filers: Select the filers you wish to upload. The "Use CFS for all filers in this upload session" option is automatically checked for you,
Extra Options• Error Scan: this feature will help you to scan your data for common formatting errors.
A pop-up screen will appear asking you to confirm your data before uploading to the Service Bureau. Report", and your report will
Another window will appear, indicating that the file has been successfully uploaded. You will now be able to view your uploaded session listed in the Service Bureau Upload Center. Your upload form summary will be printed, this will confirm the file was created and successfully You are done! A confirmation email will be sent shortly (it may take 24 hours). |
Upload forms to Print, Mail and e-File
Before you begin, it is important to import your data into the software. Please refer to this tutorial on how to import your data. When you are ready to upload your file for Print/Mail and IRS filing start by going to the second step labeled 'Printing and Mailing', click on the option 'Via de Service Bureau' to proceed with your upload.
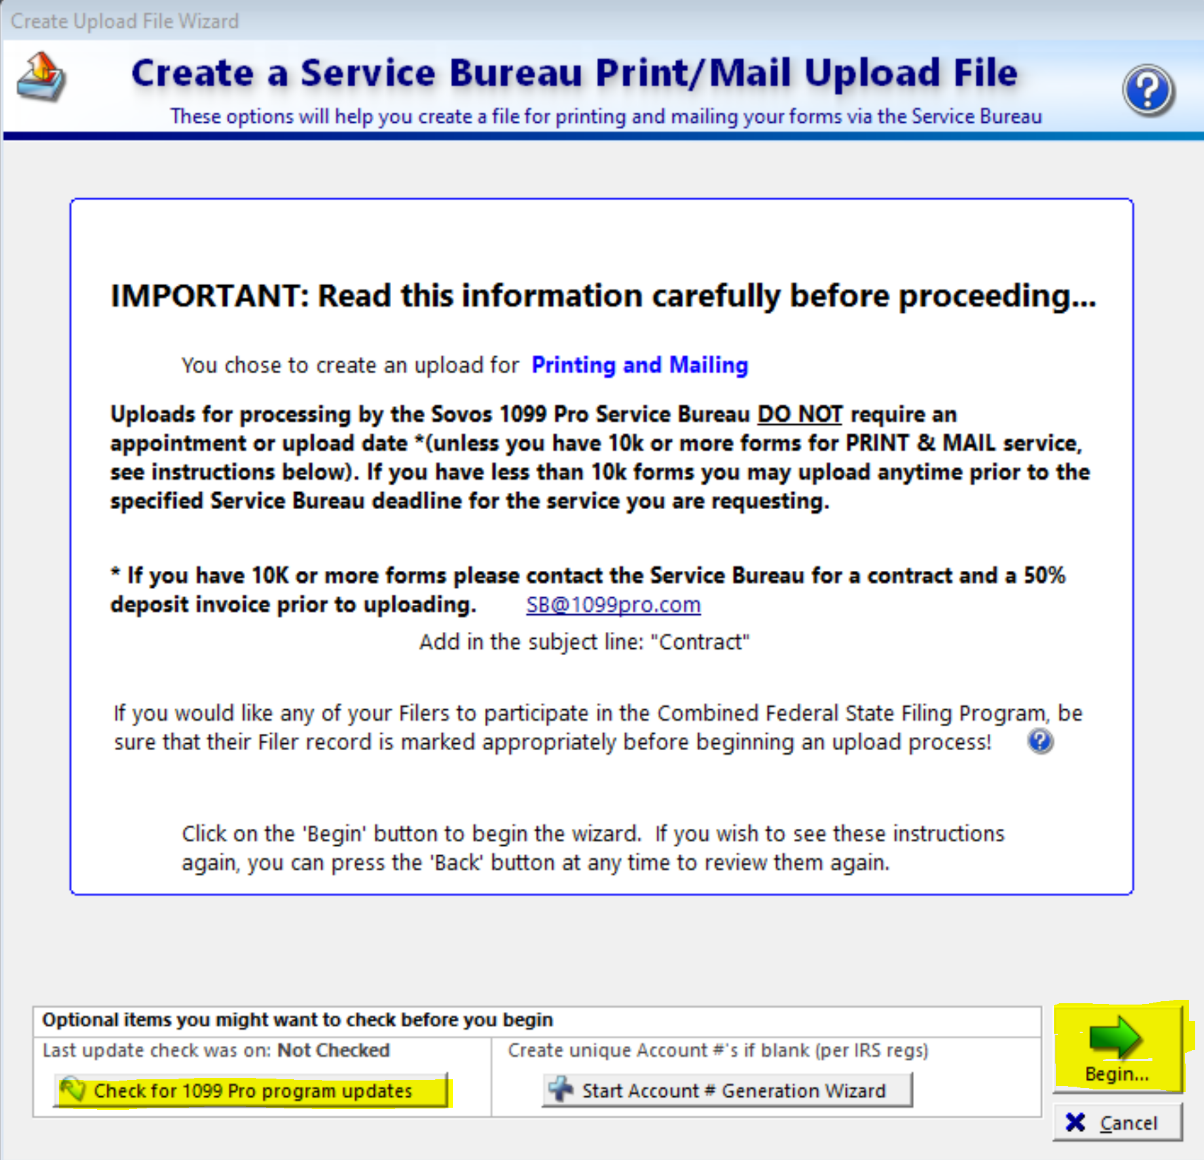
If you wish to utilize the Service Bureau for the printing, mailing, and e-Filing of your forms to the IRS and eligible states, please click on the 'Printing & Mailing or E-Delivery Upload' button. This will trigger a user-friendly wizard that will guide you through the entire upload process. 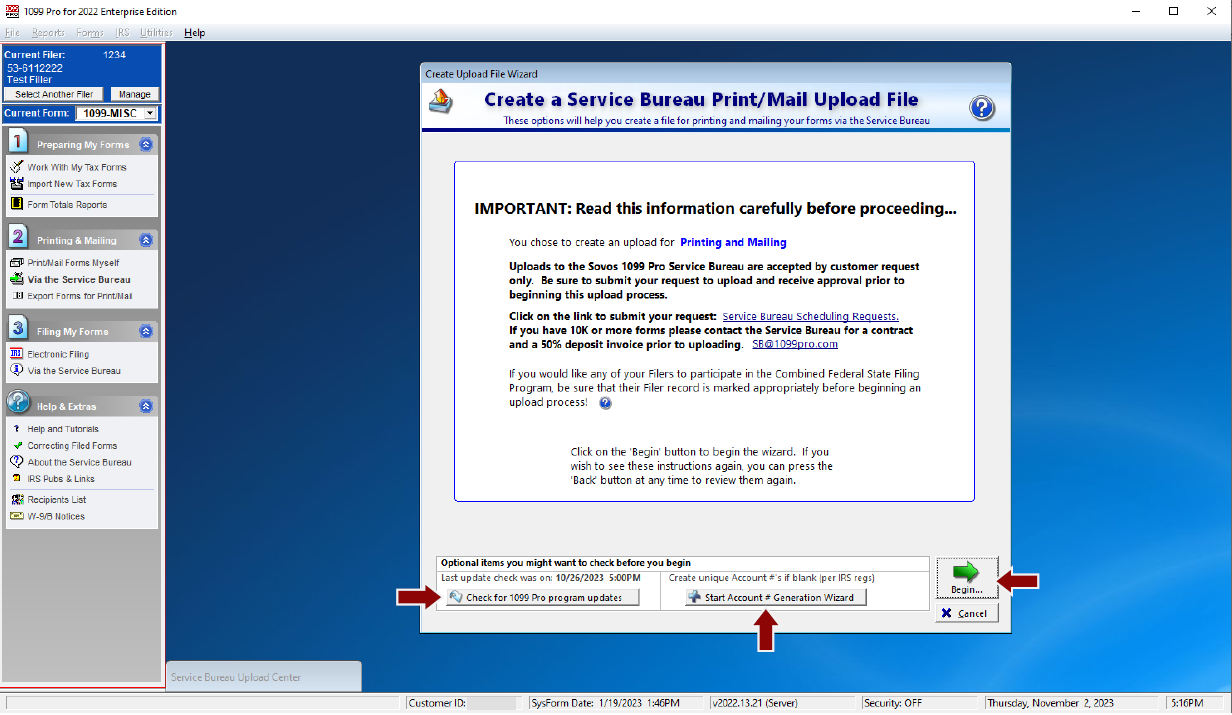 1. Check for Updates: It is essential to ensure that you are using the most up-to-date version of the 1. Check for Updates: It is essential to ensure that you are using the most up-to-date version of thesoftware. If there is a software update available, please apply it before proceeding to the next steps. 2. Account Number: The IRS requires that you provide a unique account number on each form. If 3. Click “Begin”: Once you have completed the preceding steps, click the 'Begin' button to continue
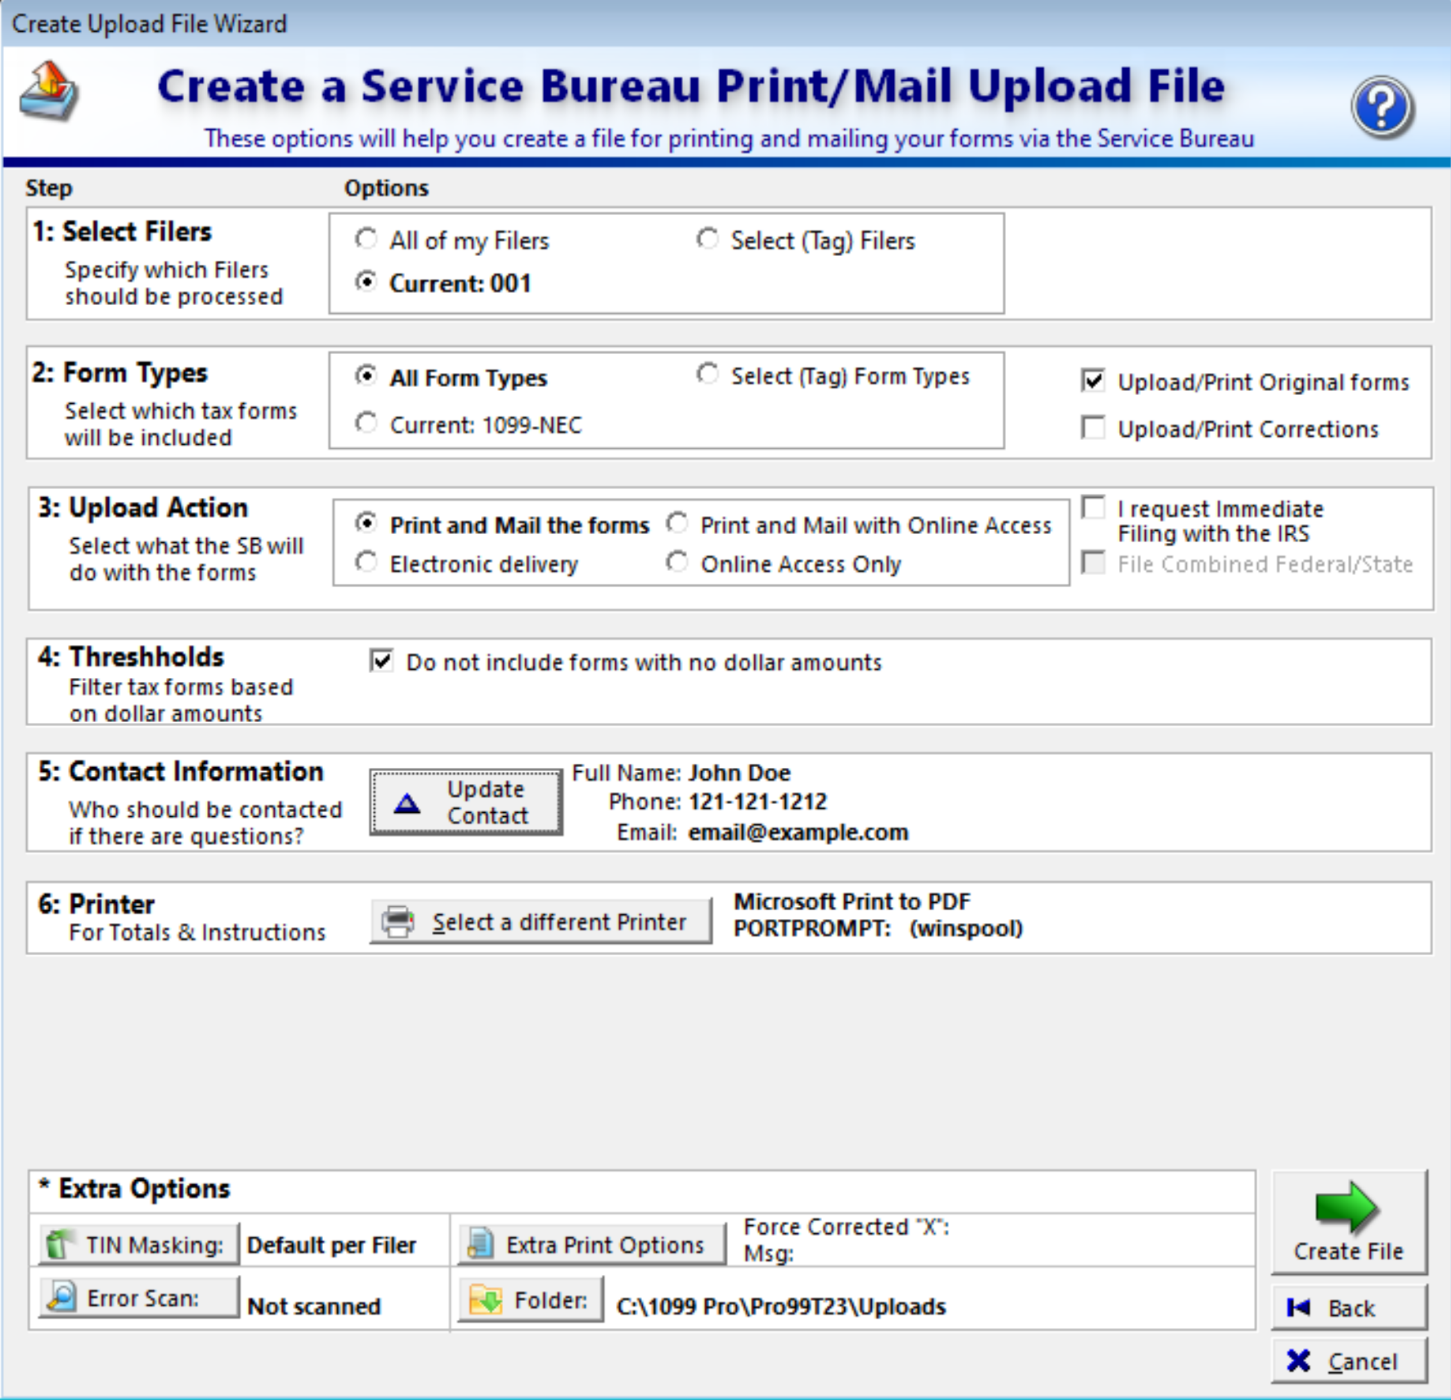
1. Select Filers: Select the filer/s you wish to upload.
The "Use CFS for all filers" option is automatically checked for you, enabling participation in the 4. Thresholds: If you are only printing and mailing forms with the Service Bureau, you can
5. Contact Information: In this step, it is essential to update your contact information.
Extra Options
Once you have configured your preferences, click on "Create File."
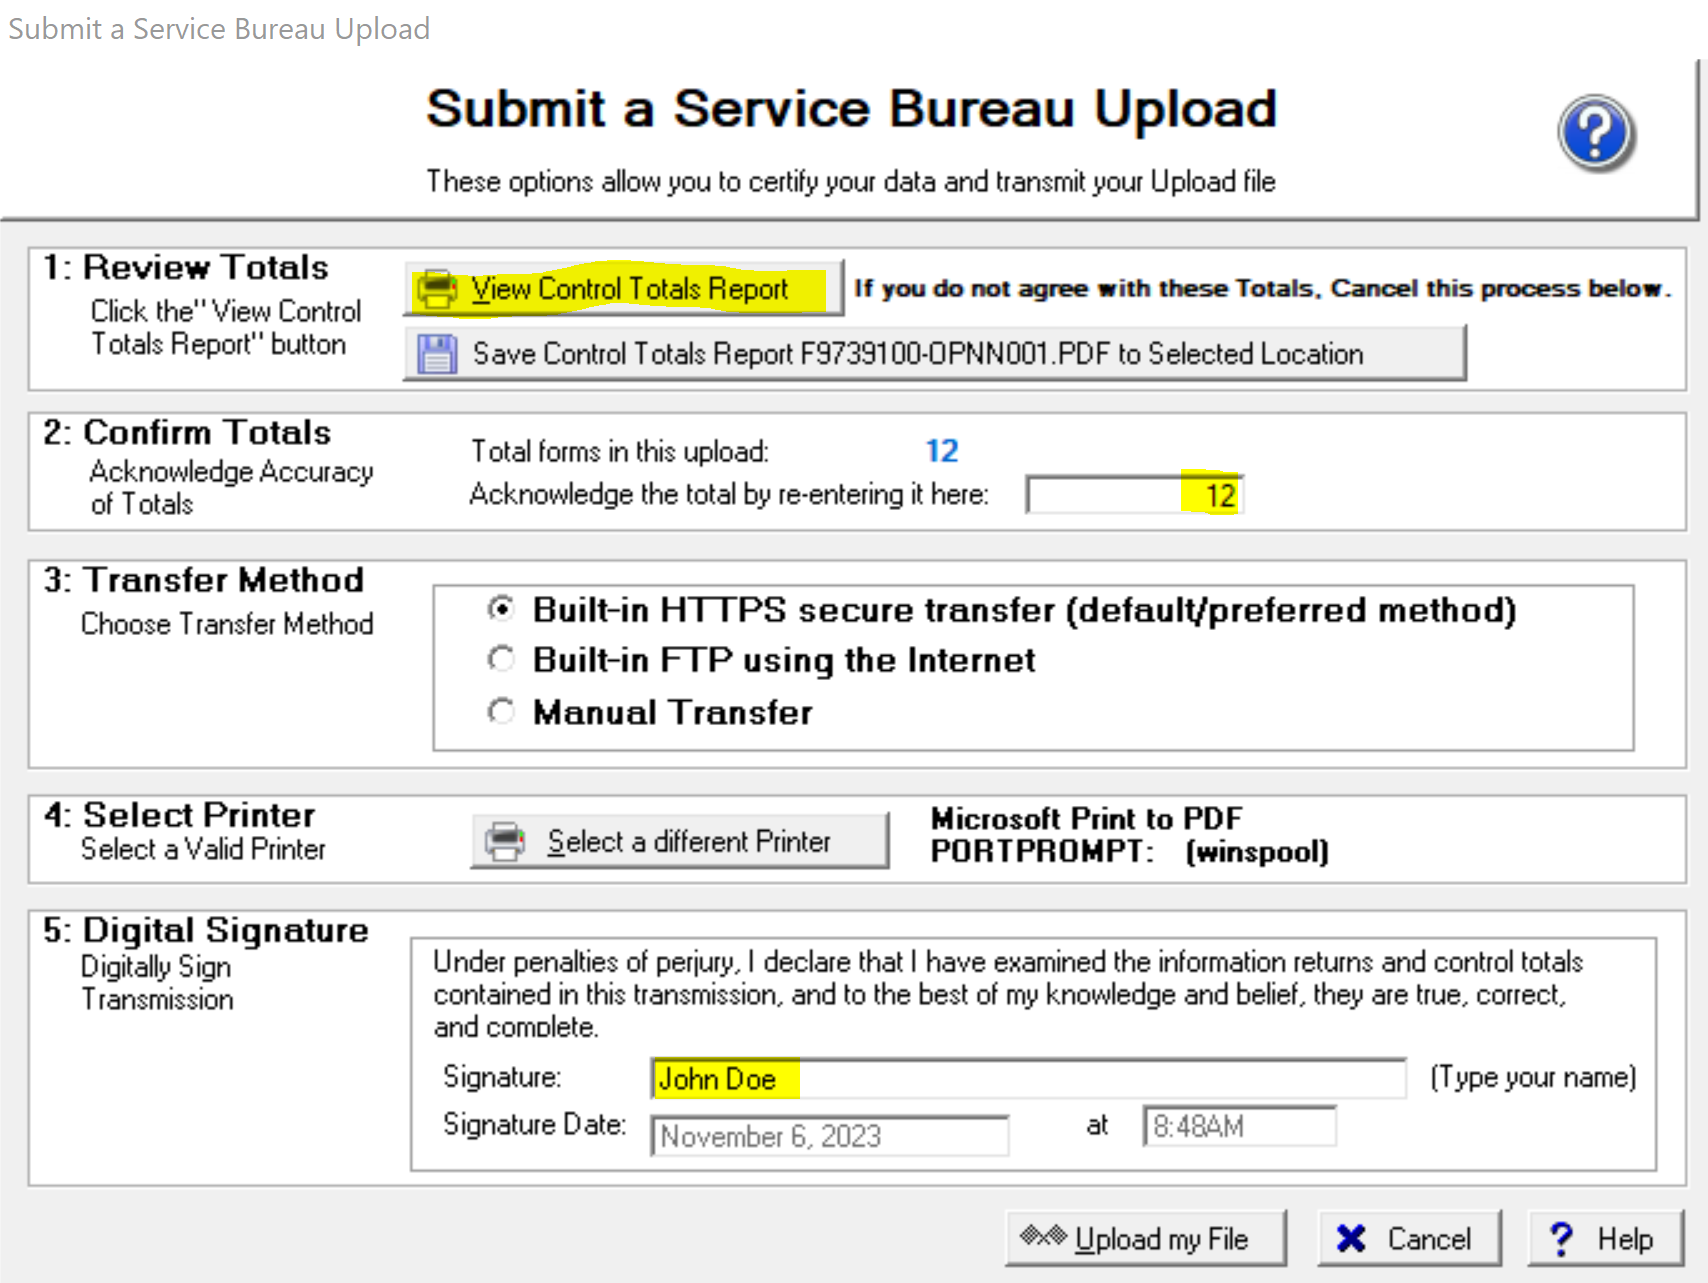
2. Confirm Totals: Reenter the total number of forms. 3. Transfer Method: Select Your Preferred Upload Method: The Service Bureau recommends using the default option, "Built-In HTTPS Secure Transfer (Default/Preferred Method)" to securely submit your data to the Service Bureau over the internet. If the first option fails due to your computer firewall, you can consider the second option, "Built-In FTP using the internet." Another window will appear, indicating that the file has been successfully uploaded. Click "OK" to proceed. Subsequently, a confirmation sheet will be printed immediately.
You will now be able to view your uploaded session listed. Please take note that the status of each
You have submitted your upload! Print /Mail and IRS filing only |
How to Submit a Bulk TIN Matching UploadBulk TIN checking is an essential compliance and risk mitigation service that identifies Recipient Name/TIN mismatches prior to filing with the IRS. Before you begin, it is important to import your data into the software. Please refer to this tutorial on how to Import.
Please click on the "Bulk Tin Matching Upload" button. This will trigger a user-friendly wizard that will guide you through the entire upload process.
Check for Updates: It is essential to ensure that you are using the most up-to-date version of the software. If there is a software update available, please apply it before proceeding to the next steps. After you checked for updates, click on the “Next” button to continue. 
Click on the “Next” button continue.
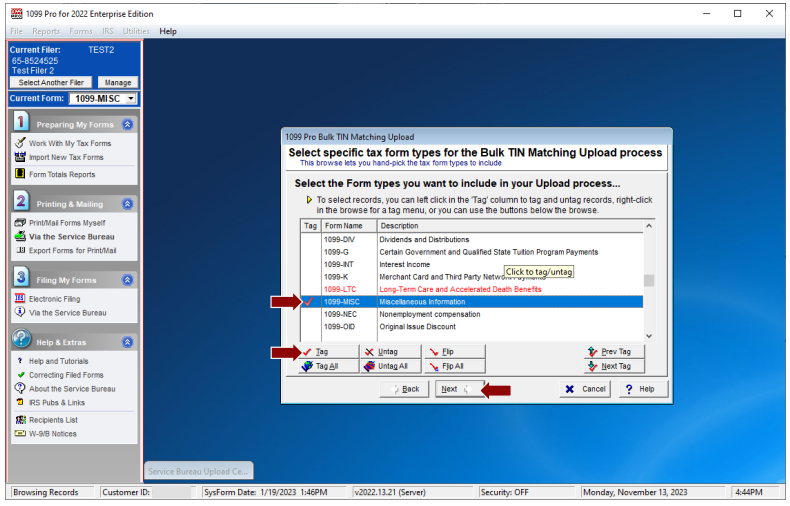 On this screen select the form types you want to include in your uploads. For this example, we will highlight the “1099-MISC” and click on the “Tag” button to select it.
The Service Bureau recommends that you leave this option as is.
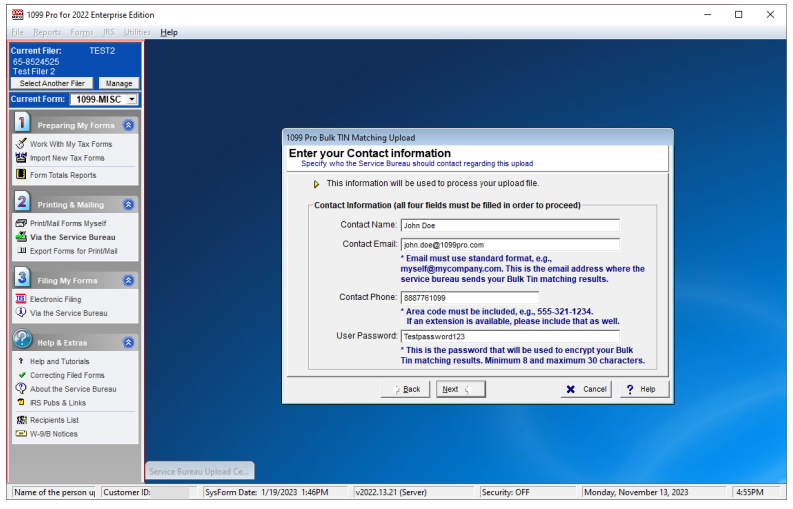 Enter your contact information and create a password.
Verify your information is correct. Then click on the “Finish” button. 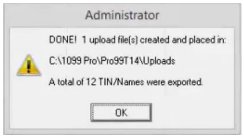 A pop-up window will appear telling you an upload file was created successfully and save to your Click on the “Ok” button. 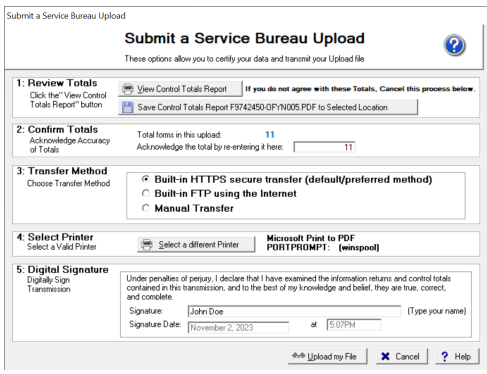 1. Review Totals: Click on the "View Control Totals 3. Select Your Preferred Upload Method: The Service Bureau recommends using the default A window will appear, indicating that the file has been successfully uploaded. Click "OK" to continue. Subsequently, a confirmation sheet will be printed immediately 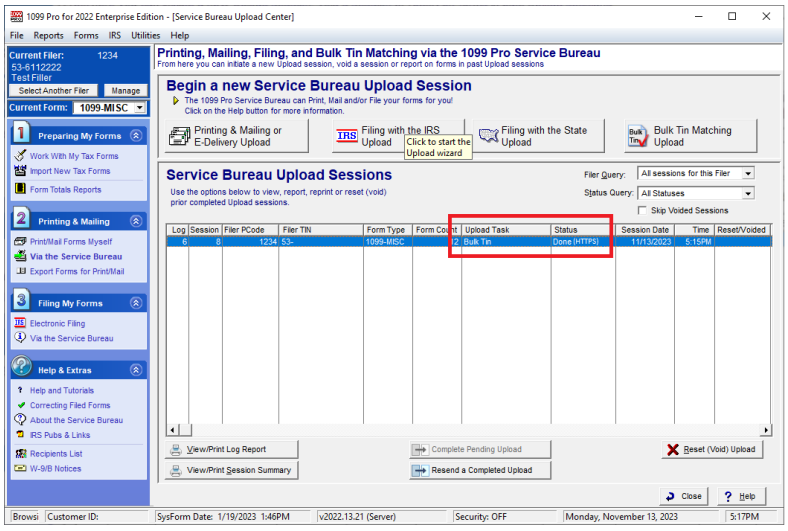 You will now be able to view your uploaded session listed under the Service Bureau Upload Sessions. Please note the status should be "DONE (HTTPS)". This is based on the selected transfer method you have selected. How do I receive my results? For more information and How to upload a Bulk TIN file video visit our Bulk TIN Match Service page. |
Most 1099 Pro software corrections must be processed manually, one-by-one, at the Work With My Tax Forms screen (the exception is Corporate Suite). Watch a video tutorial on corrections, Click here, or view detailed instructions below. How to File Corrections (Desktop) The cost to submit eFile Only corrections is $45 per upload. Standard rates apply for Print uploads. Watch a video tutorial on corrections, Click here.
For more information on corrections please visit the wiki page. |
______________________________________________
If you require further information, please visit our website at
www.1099pro.com or email us directly at sb@1099pro.com.
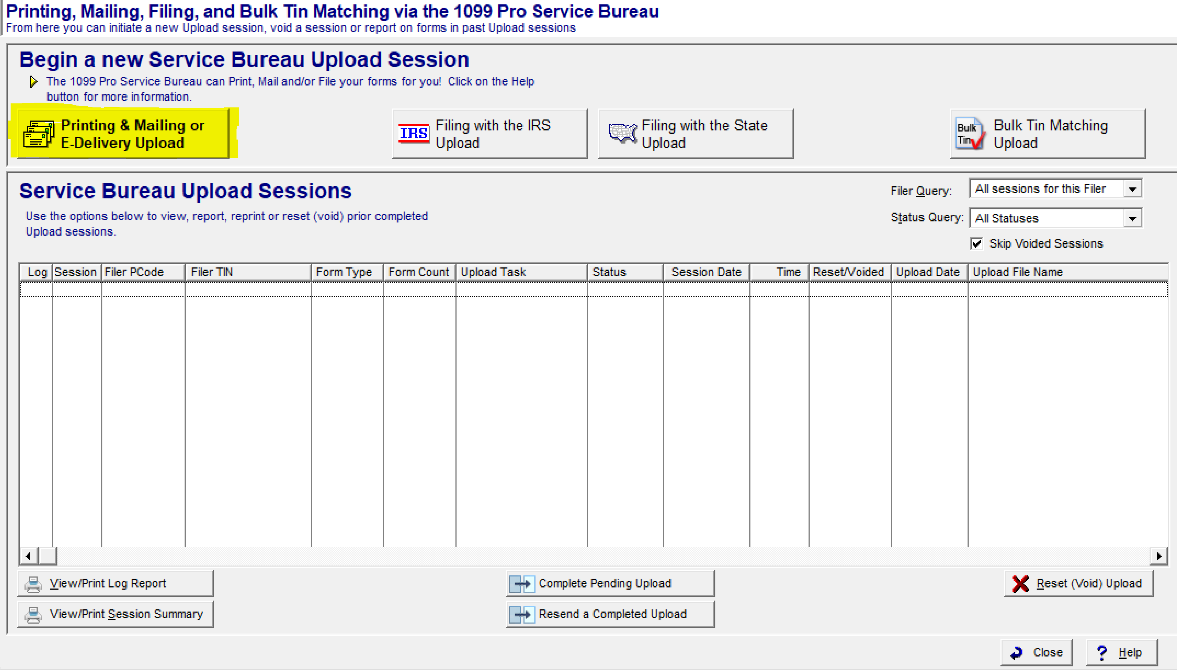


 In this step, you can choose to file the forms with the IRS by clicking on


 You can specify where the upload file should be created. In almost all cases you will want to save your upload file to the default location. Click on the “Next” button to continue.
