- Loading...
- Support multiple browsers: Internet Explorer 6 or higher, Chrome, Firefox, Safari;
- Made changes to Recipient Lookup page to give choice options similar to the Form Lookup page;
- Made changes to Recipient Lookup/Form Lookup pages to make search persistent throughout user's session;
- Added the ability to email PDF copies of forms to recipients with up to 256-bit AES encryption.
- Note: This option must be configured in the 1099 Pro Corporate Suite software in the "Set Email Server And Account" area in "Security and Administration" prior to usage, then the information in the "Recip. Email" field in "Email/Postal" tab for each record.
- Changed Form Counts report: We've added the ability to select between "All Filers/All Forms", "All Filers/Selected Forms", "Selected Filers/Selected Forms
- Added the abilty to perform advanced Pcode lookups. For more information click here.
Getting Started - Logging In and Logging Out:
Thank you for using 1099 Pro! The following information will help you use 1099 Pro.NET. If you would like to skip to a specific section, please refer to the navigation bar on the left side of the screen. To be sure that 1099 Pro.NET runs correctly, be sure to turn off your pop-up blocker, or list the url as a safe site in your web browser.
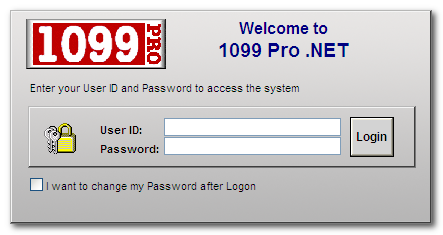
- Begin by opening the 1099 Pro ASP web page. If necessary, enter the address into your web browser's (Internet Explorer, Safari, Chrome, or Firefox) address bar. Please note that the web address will be defined by the person that sets up the 1099Pro.Net server, for additional information please contact your System Administrator.
- Enter your assigned User ID and Password and press the "log in" button. If you wish to change your password, place a check in the checkbox labeled "I want to change my password after logon". If this is your first time logging in, the default password is "NEW". Please note that after three failed log in attempts, the program will automatically lockout the user until the program administrator resets their account.
- When you log in, the software will automatically attempt to open the Filer/PTIN last used. If your security rights do not allow you to access that Filer or if you have never logged in before you will be asked to choose a Filer.
- To select a Filer which contains the forms you wish to work with, click on it from the provided list and then click on the "Select" button.
- To logout of the software, simply click "Log out" located at the top right of the application. Please note, you will be automatically logged out if you have been inactive for more than 20 minutes
Common Search Features and Functions
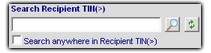
All search boxes in 1099 Pro ASP can be used in the same way.
- Clicking on the magnifying glass button
 will start your search.
 - Clicking on the refresh button
 will reset all search settings and clear the current search criteria.
- To select a form listed in your search results, single click on the row that it occupies. Once selected the record will be highlighted in blue. Use the action buttons at the bottom of the window to perform the task desired.
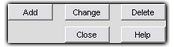
(Common action buttons)
Tips for displaying and sorting multiple records on screen:
- To sort search results by a particular column, click on the heading you wish to sort by.
- The greater than "(>)"
 or the less than "(<)"
  sign next to the column header indicates the sort order.
- "(>)" denotes ascending sort order and "(<)" denotes descending sort order.
- Clicking on the column heading a second time will cause the sort order to flip from its current sort order to the opposite sort order.
- Clicking on a column heading will also alter the search function to match the column you click on. For example, clicking on the "Recipient TIN" header will cause the search type to change to "Search Recipient TIN(>)".
- When entering a TIN in a Search Criteria box, dashes are not required, although if you are entering a TIN on a tax form (i.e. a new form) the dash is required. Adding the dash when entering a TIN on a tax form determines the TIN type (i.e. SSN and EIN) which makes dash placement extremely important.
Miscellaneous:
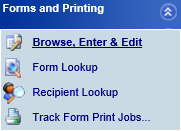
- To expand or contract a menu item on the blue task bar to the left, simply click on the blue arrow
 next to the menu's title.
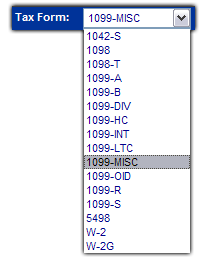
 - To expand a drop down menu, click on the downward facing arrow on the right end of the box.

- The expanded menu contains a list of options. To select an option, click on the desired item.
- Once a selection has been made, the drop down menu will "roll up" and display your selection.

Form Lookup

The "Form Lookup" search is a direct search thru all Filers, all Form Types, for either the current or all prior tax years. When the current year is selected, the search will only return results for the current year. When a prior year is selected, the search will return results for all prior years. You may also specify a particular year by indicating a "Tax Year" in one of the "Select Search Field" drop-down menus.
Please click here for more information on selecting a "Tax Year".
- Click on "General Options" on the blue task bar to the left, then click on "Form Lookup" to begin a form search.
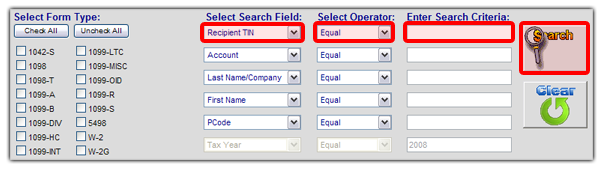
- First select which form types the software will search by placing a check in the box to the left of the desired form type.
- Select your search criteria from any of the options in the "Select Search Field" drop down menu.
- Select your operator from the "Select Operator" drop down menu.
- Enter your search criteria in the "Enter Search Criteria" box by clicking in the "Enter Search Criteria" text box and typing your search criteria.
- Click on the magnifying glass button to begin your search.
- To select a form listed in your search results, click on the row that it occupies so that it becomes highlighted in blue.
Example: Lynda needs to find all forms issued in tax year 2004 by PCode (Payer Code) 1942. Here are the steps she needs to take to find her forms:
- From the "Form Lookup" screen, Lynda sets the first "Select Search Field" to "Tax Year".
- Under the "Select Operator" drop-down menu, Lynda selects "Equal".
- In order to search by "Tax Year" you must be working with forms from a year other than the current tax year.
Please click here for more information on selecting a "Tax Year".
- In order to search by "Tax Year" you must be working with forms from a year other than the current tax year.
- In the "Enter Search Criteria" field, she types "2004". The first part of her search is complete, she now needs to setup her search to limit results further.
- In the next "Select Search Field" drop-down menu, Lynda selects "PCode".
- In the "Enter Search Criteria" field, Lynda enters "1942". Her search is now ready!
Lynda then clicks on the magnifying glass icon to begin her search.
Creating New Tax Forms
This section will outline the simple process of adding a new form to your filers database.
First you will want to have your correct filer selected, you will be able to see who the current filer is in the "Current Filer Window", located at the top left corner of your window. The information in the "Current Filer Window" will be used in the creation of your tax form(s), if this is not correct please see the section on selecting your filer before you continue.
Once that is completed you will need to select the tax year that you would like to create the form for, this can be found underneath the "Current Filer" box.
Underneath the Tax Year box you will see the "Tax Form" drop down box, here you will be able to select one of the various forms that are available for creation within 1099 ProNet.
Once you have chosen the form that you would like to create a new form for click on the "Add" button.
You will then be presented with a graphical representation of the form that you selected.
From here you can either click on the various fields.
Note: You can also use the "Tab" button to cycle down through the fields, or "ctrl-tab" to go up through the various fields.
Once you are done you may click on the "Save Form" button
Note: If there are any errors or warnings regarding your form you will be informed when you click the "Save form" button.
From there you will be taken back to the "Enter, Update and View" screen.
Printing
- In order to print a form, click on a record to select it and then click on the "Quick-Print Form"
 button.
 - Select which copies you wish to print by placing a checkmark in the boxes to the left of each copy type.
- You may require the use of the optional "Advanced Printing Options". For more information regarding these options, please click here.
- When you have finished selecting your printing options, click on the "Print Now" button to begin the print process.

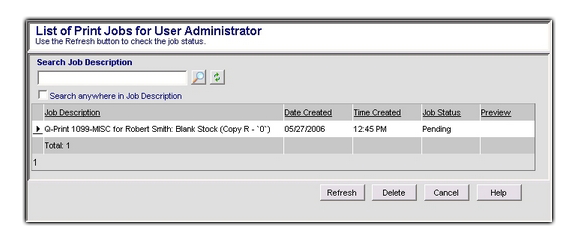
- After clicking on the "Print Now" button, a window labeled "Print Bin" will pop-up. Personal to an individual user, the "Print Bin" displays the print job history for that user.
- Check under the "Job Status" column to see the status of the print job. All new print jobs should have a status of "Pending". Click on the "Refresh" button to update the current status of all jobs in the "Print Bin".
- "Pending" indicates that a PDF has not yet been generated.
- "Completed" indicates that a PDF is available by clicking on the "View" link under the "Preview" column. You can then use the PDF to print a hardcopy.
Note: To remove an item from the "Print Bin", click on the job to select it and then click on the "Delete" button.
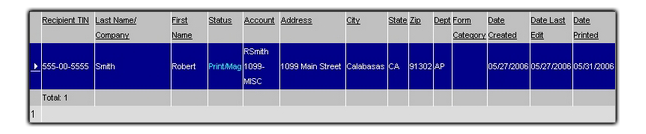
Note: To search for a particular print job, enter your search criteria into the "Search Job Description" box and then click on the magnifying glass to begin your search (i.e. Robert Smith).
Note: Please see Appendix B for information regarding duplex printing.
Return to the Top
Send email from 1099Pro.NET quickly & securely
Now you can send encrypted PDF’s directly from 1099Pro.NET. Features include:
- Secure Password-Protected, AES 256-bit Encrypted Files
- Built in features for custom passwords, reply address, subject, and email message body
- All actions recorded by Audit Trail feature
- Mark any processed form as printed or protected
User Guide for emailing from 1099Pro.NET
- In the main screen of 1099Pro.Net, click on the “Quick Print” button located near the bottom of the screen.
- From here, users can access the emailing feature by clicking the “Email” button in lower right.
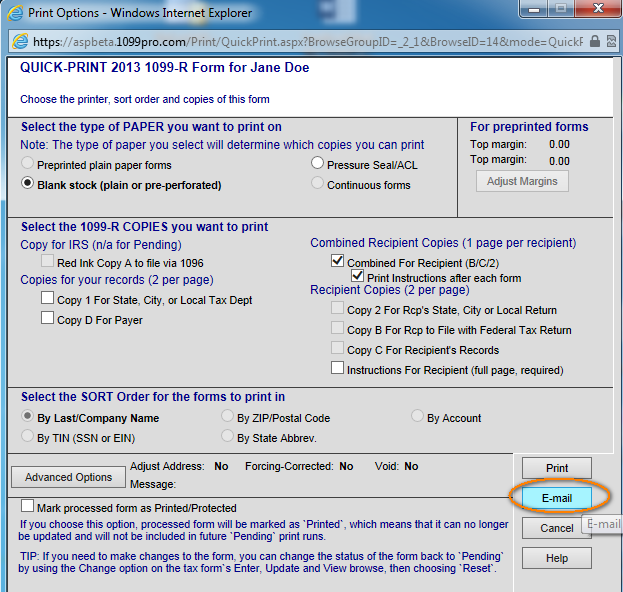
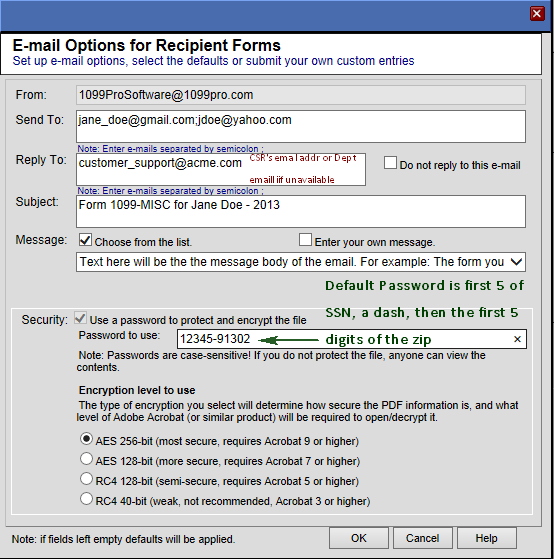
- In the next screen, users can manage the settings and preferences before sending a secure email. Editable preferences include:
- From field is configured and can only be changed by IT/Admin.
- Send To field is populated by the Email/Postal TAB/field on the red & while image of the form. Typically, this data is imported but if not, you can add it on the form directly (best), key it in, or paste it on the screen above. . Multiple address should be separated by semicolons (;)
- Reply To address will default to the address in your user security tables. IT or Admin typically is in charge of this. If you do not have an email in the security table then the default address is populated from the department email address as configured for the filer. Like Security, this too can only be set from the CS Software.
- Subject is the Form Type: Name” and “- Tax Year”
- Message appears in the body/text of the email. Default Messages are set up by IT/Administration via the CS Software. Users can check “Enter your own message” and enter custom text.
- Security is set to always on and is dimmed. The password for the PDF will be the first 5 digits of the SSN or TIN followed by a dash (-), followed by the first 5 digits of the zip code. By default, 256 Bit AES encryption is set. This requires recipients to use Adobe Acrobat 9 or higher to view the attachments. Consider using AES 128 or RCA 128 if your recipient has an old version of Adobe.
- Forms will be marked as printed or protected if this feature is enabled from the CS Software. Audit Trails will record E-mailed & Web Print when printing from CS
IT Setup Guide – as easy as 1, 2, 3!
The following items must be configured by a Corporate Suite Software administrator:
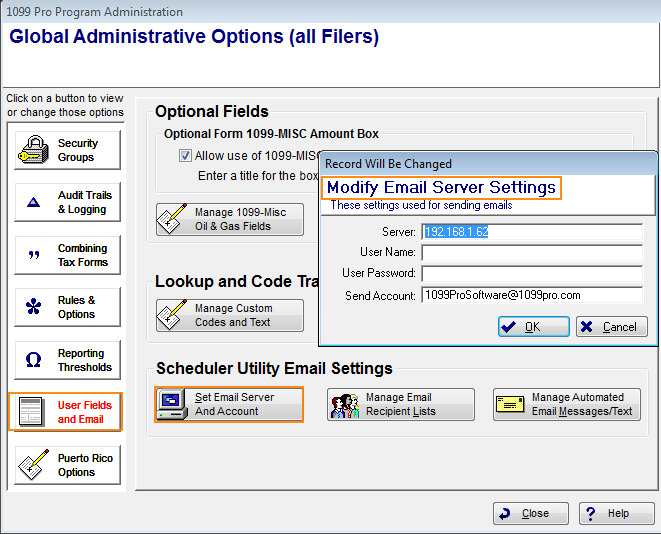
- To configure your email server, click on “File,” “Security & Administration,” then “User Fields and Email” then click on the button “Set Email Server and Account”
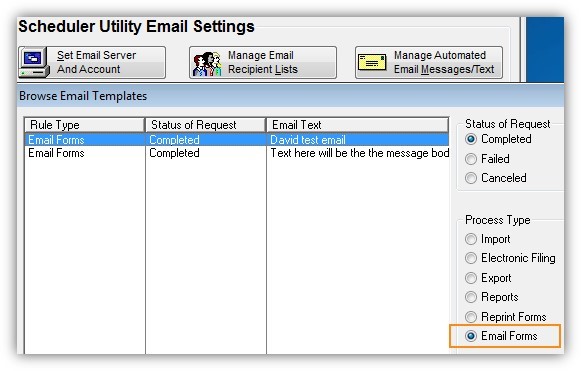
- To add default text to the body of your email, click on “Manage Automated Email Messages/Text.” Under the “Process Type” section, select the “Email Forms” option to display all emails loaded into the system. From here, you can add or edit the default text of any email.
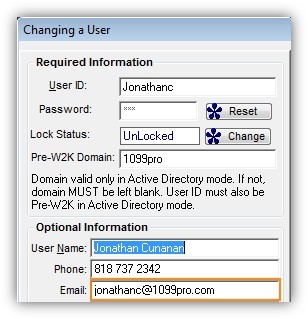
- By default, replies will return to the email address of the user who sent the original correspondence. User information including name, phone number, and email addresses can be edited at any time; while in the main screen of Corporate Suite, click on “File,” “Security & Administration,” “Security Groups” and then “Add/Update Individual Users.”
Appendix
Creating Corrections
- To create a correction, select a form with a filed status (i.e. "Print/Mag", "SB Filing", etc) from either a list of search results or the "Browse, Enter & Edit" screen.
Note: Changing an address on a filed form should not be considered a correction. Address information should be changed via the "View the Form" button and not by clicking on the "Create Correct" button.
Click here for more information regarding changing address information. - With the filed form selected, click on the "Change" button.
- At the "This is a Protected Form" window, click on the "Create Correction" button.

- Make the required corrections to your form by clicking on any of the boxes or fields on the form.
- Press the "Tab" key or select another box on the form to apply a change.
- Any corrections made to the form will be indicated by blue text. There will also be correction information at the bottom of the form which specifies the type of correction, whether a copy needs to be sent to the recipient and whether a copy needs to be sent to the IRS.
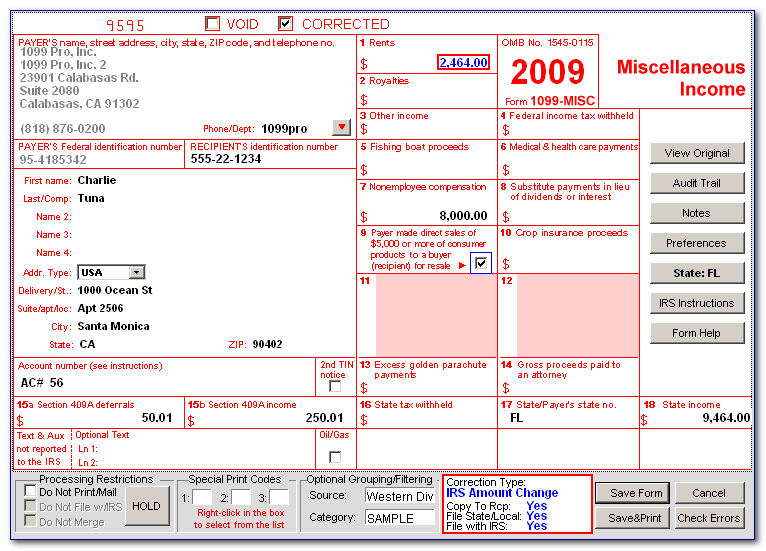
- Click on the "Save" button to save your corrections.
- You will now be sent to the "Protected Form (Filed, with Corrections)" screen. Here you can view, change, delete or add further corrections in the future to this form by using the corresponding action buttons.
- To print the original form, simply click on the "Reprint Original Form" button.
- To reprint the corrected form, click on the "Reprint Correction Form" button.
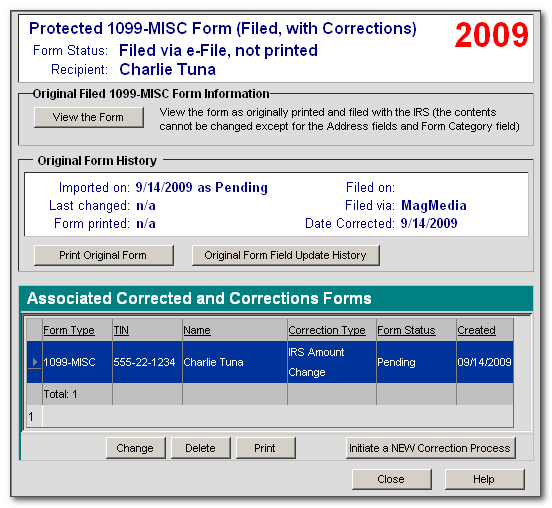
- When you are finished, click on the "Close" button to exit.
Return to the Top
To begin with click on the "Track Print Jobs" icon in the "Forms & Printing" menu. Note: If you do not see the "Track Print Jobs" icon, click on the drop down icon on the "Forms & Printing" bar, below the Tax Form drop down menu. This will open the "Print Bin" window, from here you will have access to the following options. Search Job Description: You can search your past jobs for specific form types, just type the form type name into the search box and press enter. Note: You can further narrow down your results by checking off the "Search anywhere in Job Description" box, then typing more information related to your print job in the text field. Delete All: Clicking on this option will allow you to delete all the print jobs that are present in the "Print Bin" Window. Refresh: Clicking this option will check the server for status updates or new print jobs. Delete: Clicking this will delete the currently highlighted print job. Cancel: Highlighting a print job and clicking cancel will allow you to stop that print job, this is useful for stopping large print jobs that were started in error, 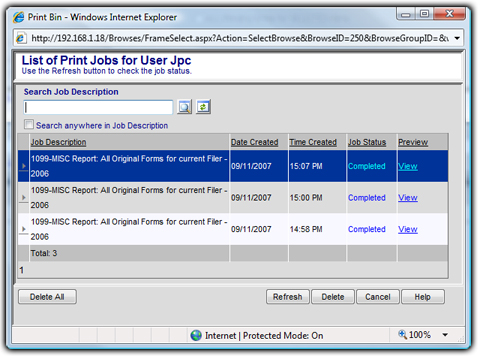 Return to the Top Custom Statement Printing
1099 Pro ASP users can access custom reports from within the interface. 945 Balancing Report
The purpose of the 945 Balancing report is to determine what the Federal/State withholding information was input into the 1099 Pro ASP interface/Corporate Suite software, this report is generated across each of the Filers in your database as well. Corrections/Late Adds report (Export to Excel) This will create a a report of all late Corrected forms, in addition to all transactions entered after the cutoff date. This report will not be printed, but will rather create a file that is compatible with Microsoft Excel. TINCheck Integration
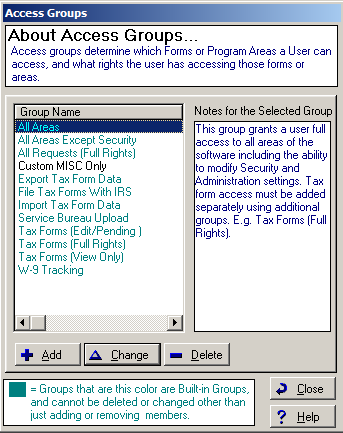
TINCheck is a service offered through 1099 Pro. TINCheck is an essential tool in identifying mismatch errors through an interactive and user friendly website prior to filing information returns. Simply log in with a username and password, and instantly gain access to multiple verification sources in one place. Users also have the option of integrating the API/web service into an existing accounts payable system, allowing your company to seamlessly verify information while entering new vendor information into your database. TINCheck offers TINCheck Bulk Processing for users that don’t need real-time results and have bulk files that require validation. TINCheck Bulk allows users to upload their bulk files through the TINCheck website and for results within 48 hours from your request. There a 2 ways you can give a user access to TINCheck integrated features. If the end user is part of a “built-in” access group, the admin can create. If the user is part of a custom access group, you can simply modify the user profile under the access group. Users belong to access group that are highlighted in green are using Built-in Groups. If using built-in groups, a new access group will have to be created to allow access to TINCheck.
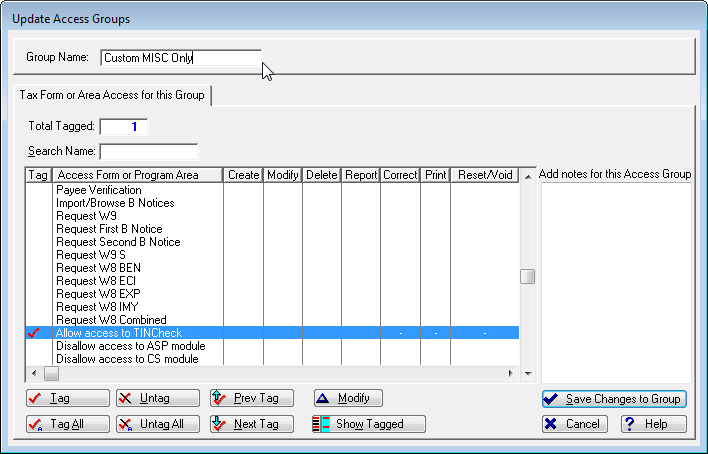
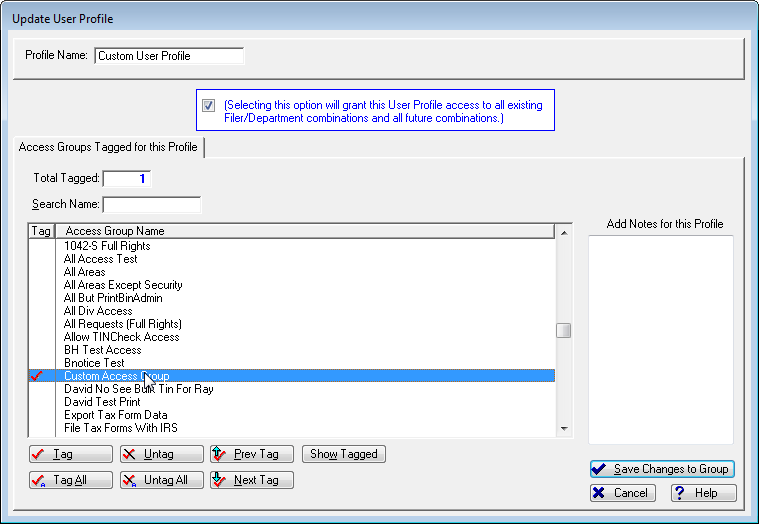
Users already using custom access groups and profiles will need to update the access group to allow TINCheck integration. Highlight the group and click the Change button. Tag the Program Area named “Allow access to TINCheck” and the click the Modify button.
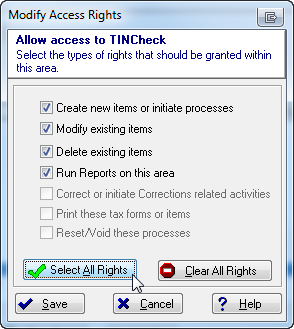
Click Select All Rights then Save.
For users using Built-In Groups, you will need to create an Access Group first and then update your User Profile(s). Click the Add button at the bottom.
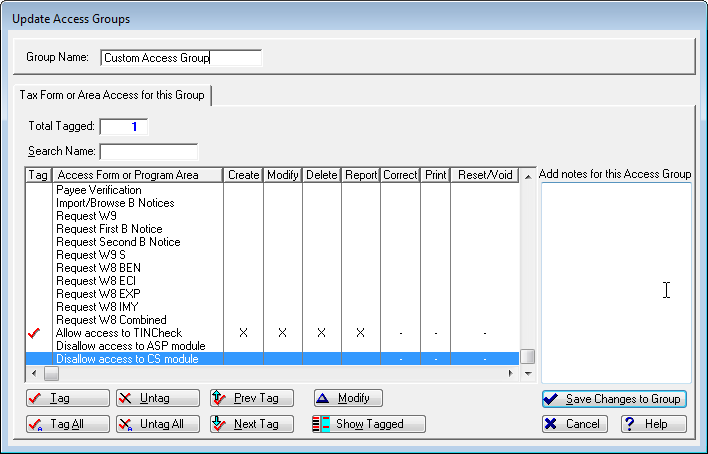
Give your new access group a name and tag Allow access to TINCheck and click the Modify button.
Click Select All Rights then Save.
Click Save Changes to Group. Go to your User Profiles and update them to include the new access group we created for TINCheck access. Tag the access group and click Save Changes to Group.
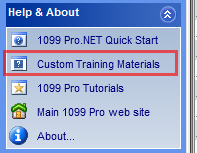
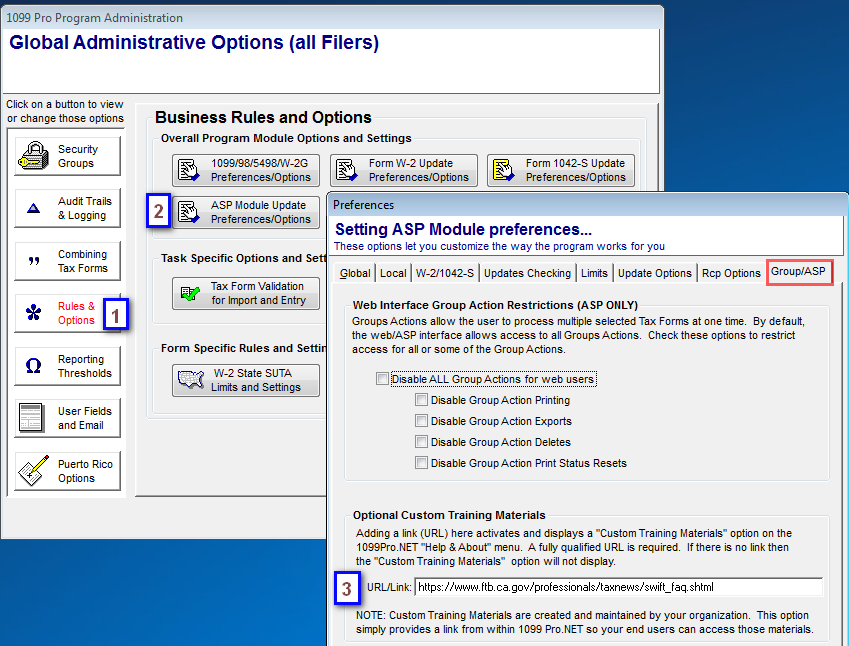
Custom Training Materials
Adding a link (URL) to 1099 Pro.NET activates the “Custom Training Materials” link shown below. Access the link from CS by clicking on “Security & Administration”, (1) “Rules & Options”, click on (2) “ASP Module Update Preferences/Options” and then on the “Group/ASP” tab. the URL/Link field (3) can be edited at any time to direct the Custom Training Materials link in the Help & About section.
|


Overview
Content Tools